12 min to read
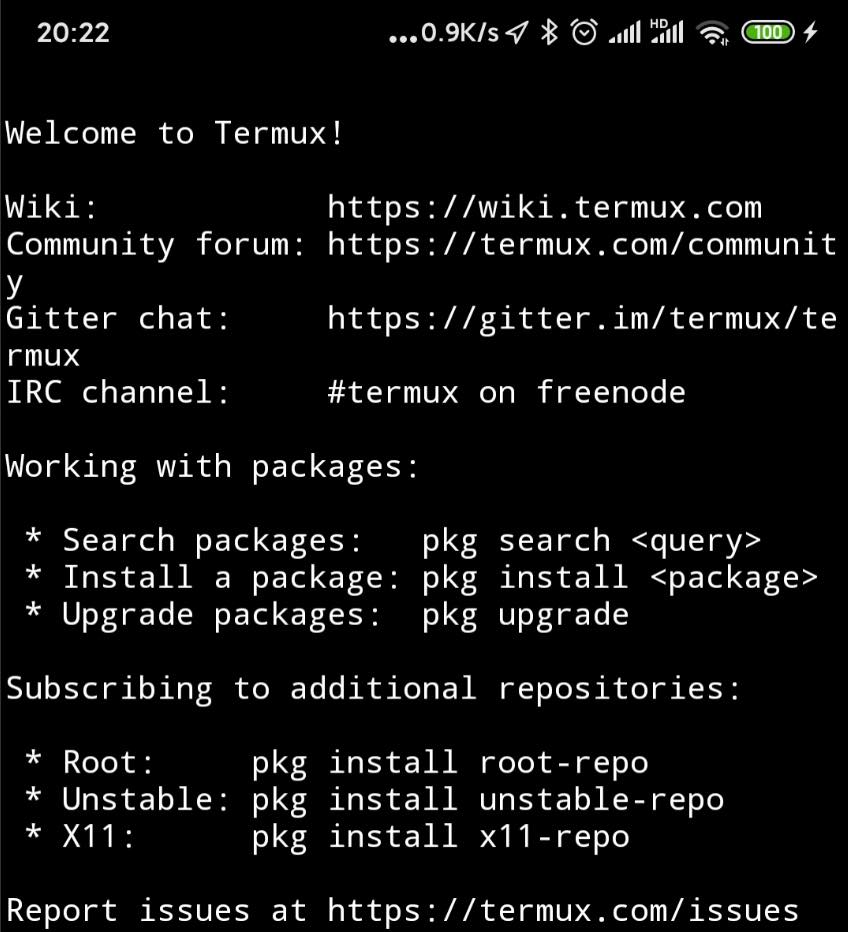
Termux Basic Tutorial
Termux Basic Tutorial
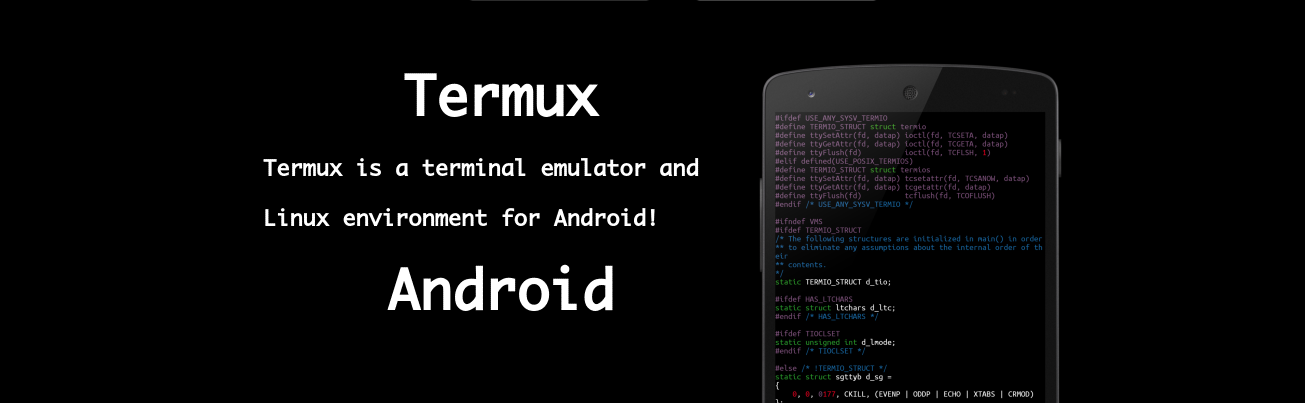
Termux হলো একটি Advanced Terminal Emulator যেটার সাহায্যে আমরা বিভিন্ন বড় বড় কাজ করতে পারি তাই এটাকে সুন্দর এবং পরিপূর্ণ ভাবে লিখে পোস্ট করার চেষ্টা করলাম!
ডকুমেন্টেশন
Termux website
Github project address
Official English WiKi Documentation
অ্যাপলিকেশন ডাউনলোড
Google Play Download Address
F-Droid download address
Initialization
Termux প্রথমবার চালু করলে কিছু ফাইল অন্য সার্ভার থেকে ডাউনলোড হতে না পেরে এই সমস্যা দেখাতে পারে:
Ubable to install
Termux was unable to install the bootstrap packages.
Check your network connection and try again.
Termux এর official remote server address: http://termux.net/bootstrap/

প্রাথমিক অভিযান
বেসিক অপারেশনটি এখনও শিখতে হবে এবং আপনি অর্ধেক প্রচেষ্টা দিয়ে দ্বিগুণ করতে পারেন। নিচের ভিডিওটি থেকে প্রাথমিক ভাবে ডাইরেক্টরি ভিত্তিক কাজটা করতে শিখতে পারেন।
Scale Text
আপনি ফন্টের আকারটি সামঞ্জস্য করতে জুম অঙ্গভঙ্গি ব্যবহার করতে পারেন হ্যাঁ, কেবল জুম ইন করুন এবং আউট করুন দুটো আঙ্গুল স্ক্রিনে ব্যবহার করে।
Long press screen
screen এ Long press করলে display তে menu items (copy, paste, more সহ) copy or paste করতে।
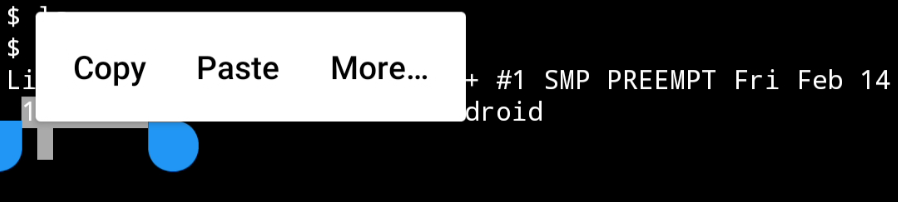
More menu এর বিবরণ:
Long press screen
├── COPY:    # copy
├── PASTE:   # paste
├── More:    # More
   ├── Select URL:             # Extract all web addresses from the screen
   └── Share transcipt:        # Share Command Scripts
   └── Reset:                  # Reset
   └── Kill process:           # Kill the current session process
   └── Style:                  # Style color matching needs to be installed by yourself
   └── Keep screen on:         # Keep the screen always on
   └── Help:                   # Help Documentation
Common keys
Common keys হল পিসিতে ব্যবহৃত কিবোর্ডের commonly used keyboard keys, যেমন: ESC, Tab, CTR, ALT keys, যেগুলো আমাদের দৈনন্দিন কাজের কর্মদক্ষতা বৃদ্ধি করে, তাই Termux এই অতিরিক্ত function key প্রদর্শন করে by default।
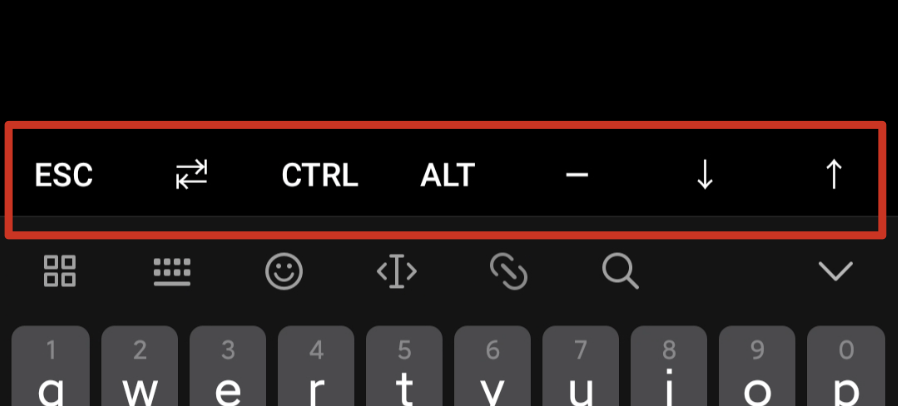
এই ফাংশন গুলোকে ঢাকার জন্য Volume+ বাটন চেপে রেখে Q অথবা K প্রেস করলেই ঢেকে যাবে অর্থাৎ ‘Volume+’ + ‘Q’ or ‘Volume+’ + ‘K’
Shortcut table
Ctrl key অধিকাংশ টাচ মোবাইলের কিবোর্ড এ থাকে না, এজন্য Termux এ volume down button দিয়ে Ctrl key এর কাজ করা যায়!
For example, Volume Minus + L, touch keyboard এ প্রেস করা, Ctrl + L keyboard প্রেস করার সমান যা দিয়ে screen ক্লিয়ার করে।
Ctrl + A - > Move the cursor to the beginning of the line
Ctrl + C - > Abort the current process
Ctrl + D - > Log off terminal session
Ctrl + E - > Move cursor to end of line
Ctrl + K - > Delete from cursor to end of line
Ctrl + U - > Delete from cursor to beginning of line
Ctrl + L - > Clear Terminal
Ctrl + Z - > Suspend (Send SIGTSTP to) Current Process
Ctrl + Alt + C - > Open a new session (for hacker keyboards only)
Volume keying একটি বিশেষ specific input তৈরি করতে পারে যেমন:
Volume Plus + E -> Esc key
Volume Plus + T -> Tab key
Volume Plus + 1 -> F1 (Volume Plus + 2 F2...And so on)
Volume Plus + 0 -> F10
Volume Plus + B -> Alt + B, returns a word when using readline
Volume Plus + F -> Alt + F, forward a word when using readline
Volume Plus+X -> Alt+X
Volume Plus+W->Up Arrow
Volume Plus+A->Left Arrow Key
Volume Plus+S->Down Arrow
Volume Plus+D->Right Arrow Key
Volume Plus + L -> | (pipe character)
Volume Plus + H -> (wavy character)
Volume Plus + U -> _(Underline character)
Volume Plus+P->Previous Page
Volume Plus+N->Next Page
Volume Plus +. -> Ctrl + \ (SIGQUIT)
Volume Plus+V->Display Volume Control
Volume Plus+Q->Toggle Display Function Key View
Volume Plus+K->Toggle Show Function Key View
Basic Commands
Termux মূলত pkg commands ব্যবহার করে যা দিয়ে আমরা প্যাকেজ ইন্সটল করতে পারি। আমরা হয়তোবা apt command এর সাথে পরিচিত থাকতে পারি তবে pkg command আমরা ব্যবহার করতে পারি এখানে। যেমন:
pkg search <query>              # Search packages
pkg install <package>           # Installation package
pkg uninstall <package>         # Uninstall Package
pkg reinstall <package>         # Reinstall Package
pkg update                      # Update Source
pkg upgrade                     # Upgrade Package
pkg list-all                    # List all packages available for installation
pkg list-installed              # List installed packages
pkg show <package>              # Show details of a package
pkg files <package>             # Show the path of the folder associated with a package
Software Installation
এই পদ্ধতিতে আমরা pkg command ব্যবহার করে package file এর ব্যবহার করতে পারি, আমরা চাইলে ডেবিয়ান প্যাকেজ ইন্সটল করতে পারি dpkg দ্বারা:
dpkg -i ./package.de         # Install deb package
dpkg --remove [package name] # Uninstall Package
dpkg -l                      # View installed packages
man dpkg                     # View detailed documentation
Directory Structure
echo $HOME
/data/data/com.termux/files/home

echo $PREFIX
/data/data/com.termux/files/usr

echo $TMPPREFIX
/data/data/com.termux/files/usr/tmp/
যারা অনেকদিন ধরে Linux ব্যবহার করছেন তারা হয়তো HOME path টি computer গুলো থেকে আলাদা পাবে কারণ এটার বিশেষ ডিজাইন এন্ড্রয়েড এর সাথে খাপ খাওয়ার জন্য বানানো.
Customize common keys
Termux v0.66 release হওয়ার পর ~/.termux/Termux.propertiesFile আমরা common function keys চাইলে পরিবর্তন করতে পারি! আমরা নিজেদের প্রয়োজনমতো নিজেরাই এটা configure করতে পারব.
এখানে ফাইলটি configure এর উদাহরণ দেওয়া হল:
# New and Edit Profile
nano ~/.termux/termux.properties
যদি Nano Editor ওপেন না হয় তাহলে আমরা নিচের কমান্ড দিয়ে আগে ডাইরেক্টর টি বানাবো,
mkdir ~/.termux
এরপর আবার আগের কমান্ড দিয়ে Nano Editor চালু করব!
এর মধ্যে আমরা যা লিখবো:
extra-keys = [ \
 ['ESC','|','/','`','UP','QUOTE','APOSTROPHE'], \
 ['TAB','CTRL','~','LEFT','DOWN','RIGHT','ENTER'] \
]
Termux app Restart করব ফাইলটা সেভ করার পর!

নিচে লেখা Key হুবহু উপরের লেখাগুলোর মাঝে বসিয়ে আপনার ইচ্ছে মত কমান্ড তৈরি করতে পারেন!
Key	Explain
CTRL	Special keys
ALT	Special keys
FN	Special keys
ESC	Exit key
TAB	Table Key
HOME	In situ bond
END	end key
PGUP	Page Up Key
PGDN	Page Down Key
INS	Insert key
DEL	Delete key
BKSP	Backspace key
UP	On the arrow keys
LEFT	Arrow key left
RIGHT	Arrow key right
DOWN	Under arrow keys
ENTER Enter key
BACKSLASH Backslash\
QUOTE	Double Quote Key
APOSTROPHE	Single Quote Key
F1~F12	F1-F12 keys
Modify startup greeting
default startup greeting এ আমরা এরকম লেখাগুলো দেখে থাকতে পারি:
মূলত আমরা যখন প্রথমবার এটি ব্যবহার করতে যাব তাতে যেন তো আমাদের খারাপ না লাগে ব্যবহার করতে বোর ফিল না করি সেজন্য আমরা নিচের কমান্ডগুলো দ্বারা লেখাটা এডিট করি।
nano $PREFIX/etc/motd
এরপর সব লেখা কেটে নিচের লেখাটি এড করতে পারেন:
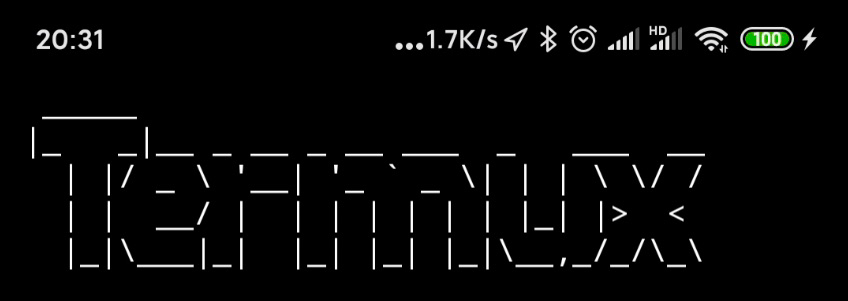
এবার নিচের লেখাগুলো কপি করে পেস্ট করি:
  _____
 |_   _|__ _ __ _ __ ___  _   ___  __
   | |/ _ \ '__| '_ ` _ \| | | \ \/ /
   | |  __/ |  | | | | | | |_| |>  <
   |_|\___|_|  |_| |_| |_|\__,_/_/\_\
Install Base Tools
নিচের ইনস্টলেশন কমান্ডটি ব্যবহার করে কিছু বেসিক টুল ইনস্টল করা যাক:
pkg update
pkg install nano curl perl wget git tree -y
Development Environment
Termux strong development environment সাপোর্ট করে যা C, Python, Java, PHP, Ruby এবং আরো অনেক development environments perfectly সাপোর্ট করে.
Editor
You’ll have to toss around with the editor before you write the code. After all, the sharpener doesn’t cut firewood by mistake.Termux supports multiple editors and is fully suited for everyday use.
Emacs অসাধারণ একটা editor যেটা খুব সুন্দর ভাবে কাজ করে এবং নিচের কমান্ড দিয়ে এটা ইন্সটল করা হয়
pkg install emacs
nano is a small and beautiful editor. এর সবচেয়ে চমৎকার একটা বৈশিষ্ট্য হচ্ছে মাল্টিপল ট্যাবে কাজ করা যায়।
It’s also easy to install:
pkg install nano
Vim কে editor দের বস বলা যায়. Basically, Linux distributions গুলোর সাথে এটা বাই ডিফল্ট দেওয়া থাকে!
pkg install vim
Officially, vim-python রিলিজ হয়েছে যা দিয়ে Python-related কাজ করা সম্ভব
pkg install vim-python
Apache
Apache is an open source Web server software, এর সাহায্যে আমরা ওয়েব সার্ভার সেটআপ করতে পারি।
Install Apache
pkg install apache2
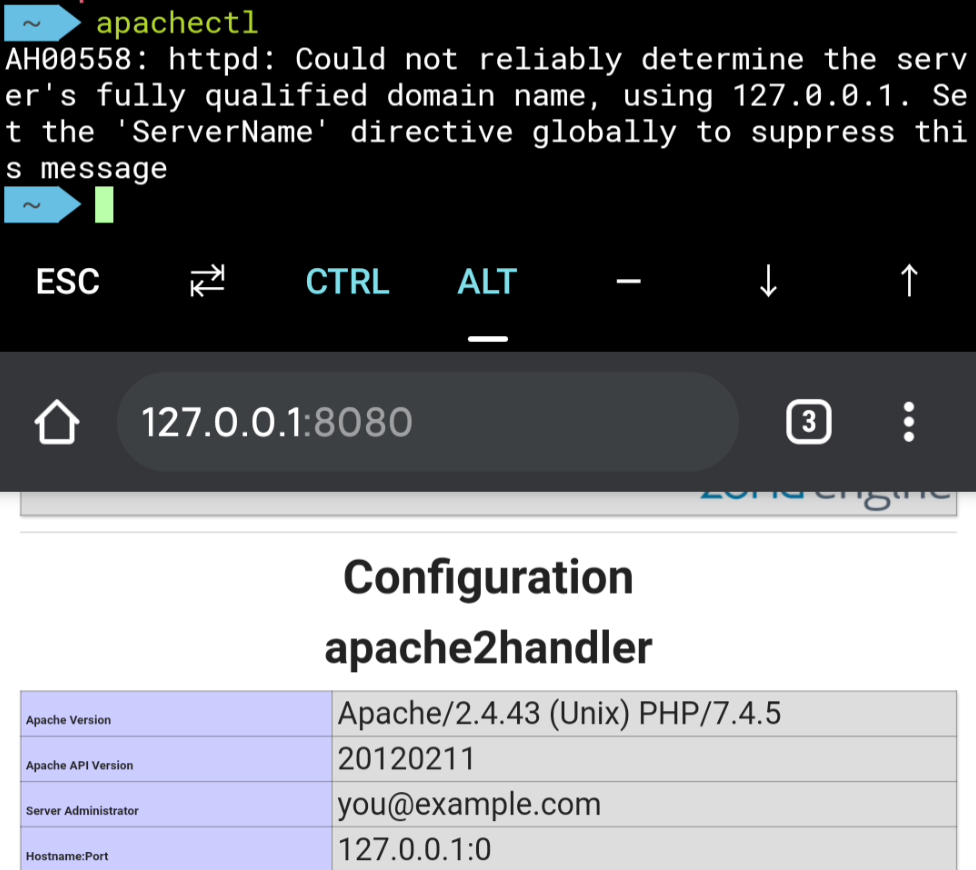
Start Apache
apachectl start
এরপর ব্রাউজারে নিচের লিঙ্কে গেলে: http://127.0.0.1:8080 এরকম দেখাবে:

The default path to Termux’s native Apache website is:
$PREFIX/share/apache2/default-site/htdocs/index.html
Stop Apache
apachectl stop
Restart Apache
apachectl restart
Apache Resolves PHP
Apache, PHP, MySQL তৈরি হয়ে গেছে এখন একটি Apache LAMPP platform তৈরি করব Android platform এ .
Install php-apache
The default Apache cannot resolve PHP, so we need to install the appropriate packages:
pkg install php-apache
Configure Apache
Apache এর default configuration file পাবো Termux এর এই ফোল্ডারে:
$PREFIX/etc/apache2/httpd.conf
configuration file সরাসরি এডিট করুন:
vim /data/data/com.termux/files/usr/etc/apache2/httpd.conf
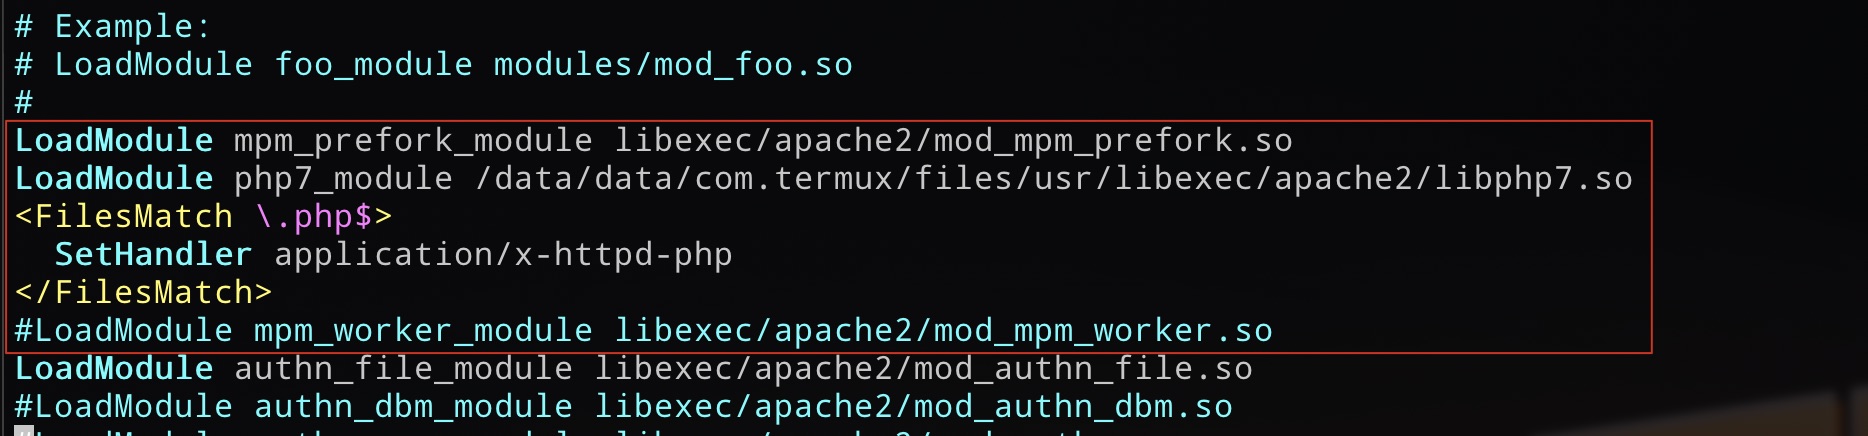
PHP এর মডিউল আলাদা করে configuration file এ থাকে না! so we need to add PHP7 modules manually:
LoadModule php7_module /data/data/com.termux/files/usr/libexec/apache2/libphp7.so
এবং নিচের লাইনটা অ্যাড করুন:
<FilesMatch \.php$>
  SetHandler application/x-httpd-php
</FilesMatch>
Next, নিচে যেখানে default home page টি configured করা সেখানে home page এ পিএইচপির Index.php এড করবো:
<IfModule dir_module>
  DirectoryIndex index.php index.html
</IfModule>
এর অর্থ site directory এর মূল পাতা হল Index.php এটুক আলাদা করে এড করা লাগবে!
Apache এর configuration file এডিট করার পর, Apache সার্ভার রিস্টার্ট করলে তা আমাদেরকে ভুল হয়েছে বলে নোটিশ দেখাবে:
Apache is running a threaded MPM, but your PHP Module is not compiled to be threadsafe.  You need to recompile PHP.
AH00013: Pre-configuration failed
ভয় পাবেন না! এটা কোন বড় সমস্যা না! এর সমাধান,:
Resolve Apache PHP error
আগে নিচের লাইনগুলো খুঁজুন!
LoadModule mpm_worker_module libexec/apache2/mod_mpm_worker.so
এবার কোডটিকে এভাবে কমেন্ট করে নিচের মতো করে ফেলুন লেখাটাকে:
#LoadModule mpm_worker_module libexec/apache2/mod_mpm_worker.so
এরপর নিচের লাইনগুলো খুঁজুন:
#LoadModule mpm_prefork_module libexec/apache2/mod_mpm_prefork.so
এবার এই লেখাটাকে অন কমেন্ট করে দিলে এরকম পাবো:
LoadModule mpm_prefork_module libexec/apache2/mod_mpm_prefork.so
সব দেখতে এমন হবে:
Parse PHP Test
চলুন টেস্ট করি phpinfo() function ঠিকমতো কাজ করে কিনা:
echo '<?php phpinfo(); ?>' > $PREFIX/share/apache2/default-site/htdocs/index.php
এরপর দেখুন: http://127.0.0.1:8080 effect টা দেখুন:
MariaDB(MySQL)
MariaDB হলো MySQL এর একটি সাধারণ রূপ! রিলেশনাল ডেটাবেজ সিস্টেম এটা। চলুন এটা ইন্সটল করা যাক!
Install MariaDB Termux এ officially MariaDB রয়েছে, so it’s easy to install:
pkg install mariadb

Start MySQL Service
Since this session of MySQL survives after normal startup, like Debug debugging, it is useless to abort the current process using Ctrl + C -> at this time, and the experience is not elegant at all, so GLOBAL uses the nohup command that comes with Linux to launch it in the background.
যেহেতু মাইএসকিউএলের এই service টি সাধারণ ভাবে শুরু হয়, একটি শুরু করার জন্য নিচের কমান্ডটি প্রয়োগ করি।
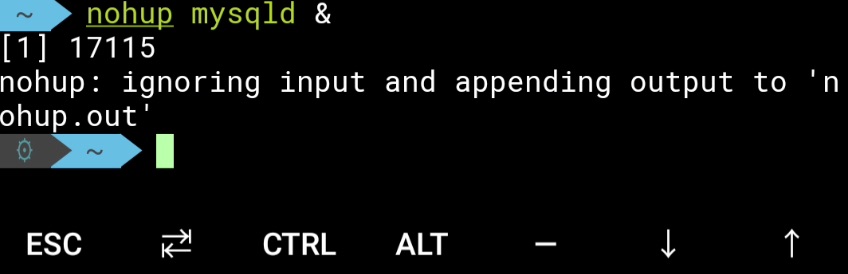
nohup mysqld &
এখন Ctrl + C -> ব্যবহার করে বর্তমান SQL Cancel করা যায়।
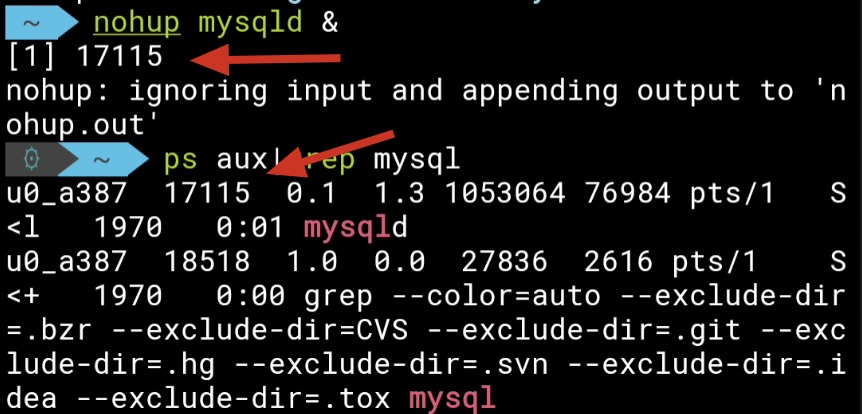
ছবিটিতে 17115 process PID number হলো mysqld এর. আমরা নিচের command দিয়ে verify করব এটা ঠিক আছে কিনা:
ps aux|grep mysql
PID number টি দেখছেন এই process:
Tips for running nohup
nohup: ignoring input and appending output to `nohup.out'
Stop MySQL Service এখানে MySQL service Termux এ সহজে বন্ধ করার কোন উপায় নেই। তবে আপনি ফোর্স পূর্বক এটিকে বন্ধ করতে পারেন নিচের কমান্ডটি দ্বারা এটিকে বন্ধ করুন:
kill -9 PID
Nginx
Nginx একটি শক্তিশালী ওয়েব সার্ভার যেটাতে আমরা খুব সুন্দর ভাবে বিভিন্ন ধরনের ওয়েবসাইট বানাতে পারি।
Install Nginx
Nginx ইনস্টল করা খুব সহজ কেবল একটি command:
pkg install nginx
After the installation is completed, it is the customary practice of Googuang to check the version information:

Start Nginx Earlier versions of Termux require a termux-chroot environment to successfully start Nginx, and new versions of Termux can be started directly, which is convenient:
nginx
Nginx এর কমন পোর্ট হলো 8080।
Then mobile direct local access : http://127.0.0.1:8080 যদি ঠিকভাবে চালু হয় তবে এরকম দেখা যেতে পারে:

আপনি দেখতে পাচ্ছেন যে ওয়ার্ডপ্রেস ডাটাবেস সফলভাবে তৈরি করা হয়েছে।.
Download WordPress
Successive versions of WordPress: https://wordpress.org/download/releases/
latest version ডাউনলোড করার পর তা unzip করি wget দিয়ে:
wget https://wordpress.org/wordpress-5.7.zip
Unzip
unzip wordpress-5.7.zip
এবার ওয়াডপ্রেস ফল্ডার টি nginx এ মুভ করি।
mv wordpress/ $PREFIX/share/nginx/html
just php-fpm and Nginx শুরু করবো:
php-fpm
nginx
Of course, যদি php-fpm and Nginx services চালু হলে পরবর্তী ধাপে যাব
Install WordPress
Browser access: http://127.0.0.1/wordpress/
WordPress এ এখন আপনার ডাটাবেজ ইনফরমেশন দিয়ে সেটআপ করুন!